How to deploy Microsoft Windows 365 Business – Cloud PC
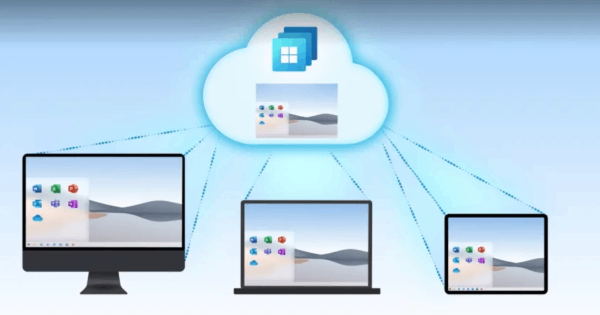
If you are reading this blog, you probably already know about Microsoft’s Windows 365 Cloud PC solution. It is an easy way to set up a Cloud PC.
There are two options available to you. One is Windows 365 Business and the other is Windows 365 Enterprise. The first option is simpler for deployment, and I will focus on the business one in this blog post.
The following is an example of someone who could use a Cloud PC: You or your client have a temporary employee and they don’t want to purchase a device. The Cloud PC can be provisioned easily, and they can access it from any BYOD device.
NOTE: When setting up MDM enrollment, ensure each Windows 365 user has an Intune license. If not, you might have problems setting up your Cloud PC.
What are the requirements?
- Ensure that devices can be joined to Azure AD.
- Every user of Windows 365 Business needs some Microsoft 365 license. For example, Microsoft 365 Business Premium or Standard.
- You need to purchase a license for Windows 365 Business and assign it to a user.
Make sure that users can join devices to Azure AD.
This is pretty simple. All you need to do is to log in as Global Administrator to https://portal.azure.com > Azure Active Directory > Devices > Device Settings and Users may join devices to Azure AD set to All.

Windows 365 Business user needs to have some Microsoft 365 license. (let’s say Microsoft 365 Business Standard or Premium)
Practically, this means that the user using Windows 365 Cloud PC should have regular Microsoft 365 license, such as Business Standard or Business Premium.
Even though I was able to install Cloud PC for a user who did not have any other license than Windows 365, if you want to use other features such as Office Suite, OneDrive, and other you should assign one.
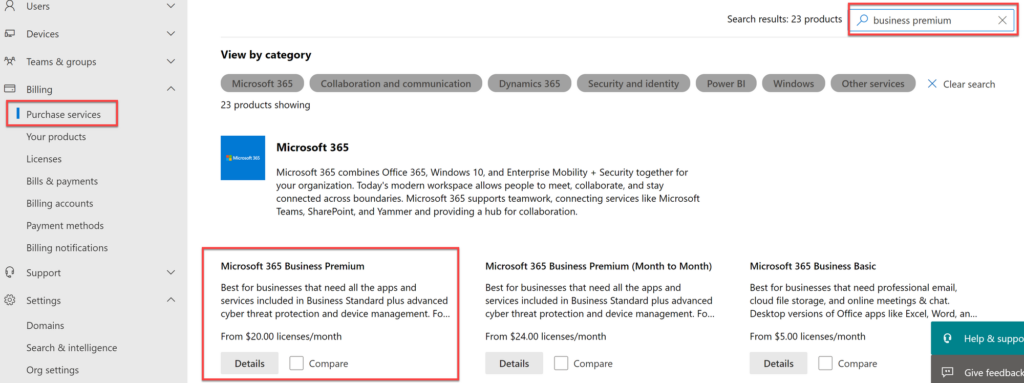
Simply go to you Microsoft Admin portal https://admin.microsoft.com > Billing > Purchase services. Search for example Business Premium. Click on the Details. Purchase it and assign to the user.
Windows 365 Business licenses must be purchased and assigned to each user.
You should get a Windows 365 Business license the same way you purchased a regular Microsoft 365 license. Go to admin.microsoft.com > Billing > Purchase services. Search for Windows 365 Business.
You will need to determine what plan you need before purchasing.
Plans are from 1 vCPU to 8 vCPUs, from 2 GB of RAM to 32 GB, and storage from 64 GB to 512 GB.
You can find more information about sizing options at Microsoft docs website.
Most office users should be fine with a 2vCPU 8 GB RAM with 128 GB of storage. Prices for this type start at $41.
The following steps show how to assign the license to a “Virtual PC” user and provision a Cloud PC.
My assignment was Microsoft 365 E5 license and Windows 365 Business with 2 vCPUs, 8 GB of RAM, and 128 GB of storage.
Note: Once you assign the license, it could take up to 1 hour to provision the Cloud PC.
What is the best way to access my virtual PC?
You can access your Virtual PC by opening your web browser and typing in the URL https://windows365.microsoft.com – log in with your credentials.
Upon logging in for the first time, you should see the welcome screen below.
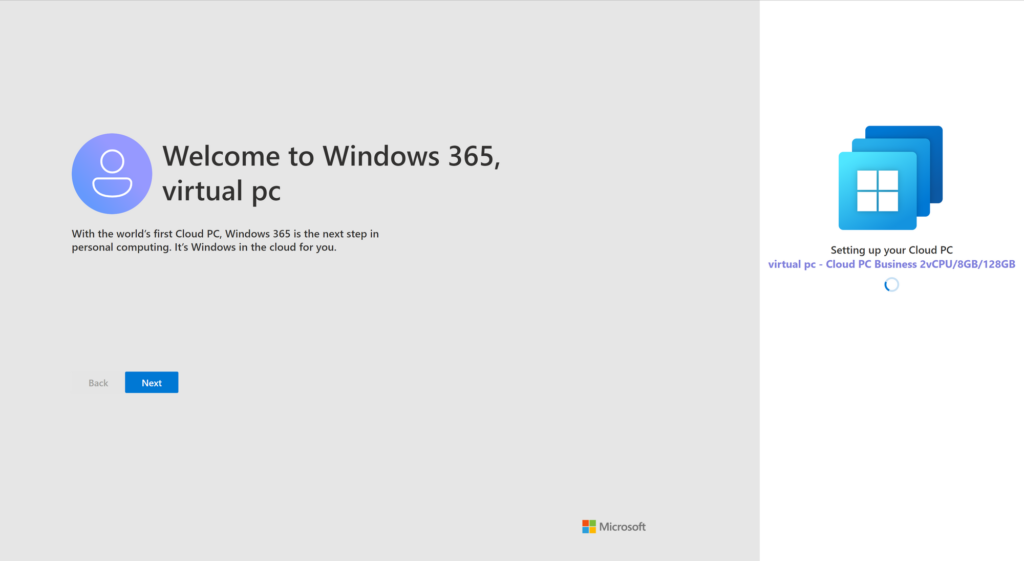
Just click on Next, Next, Next and Get Started. Welcome to your Cloud PC.
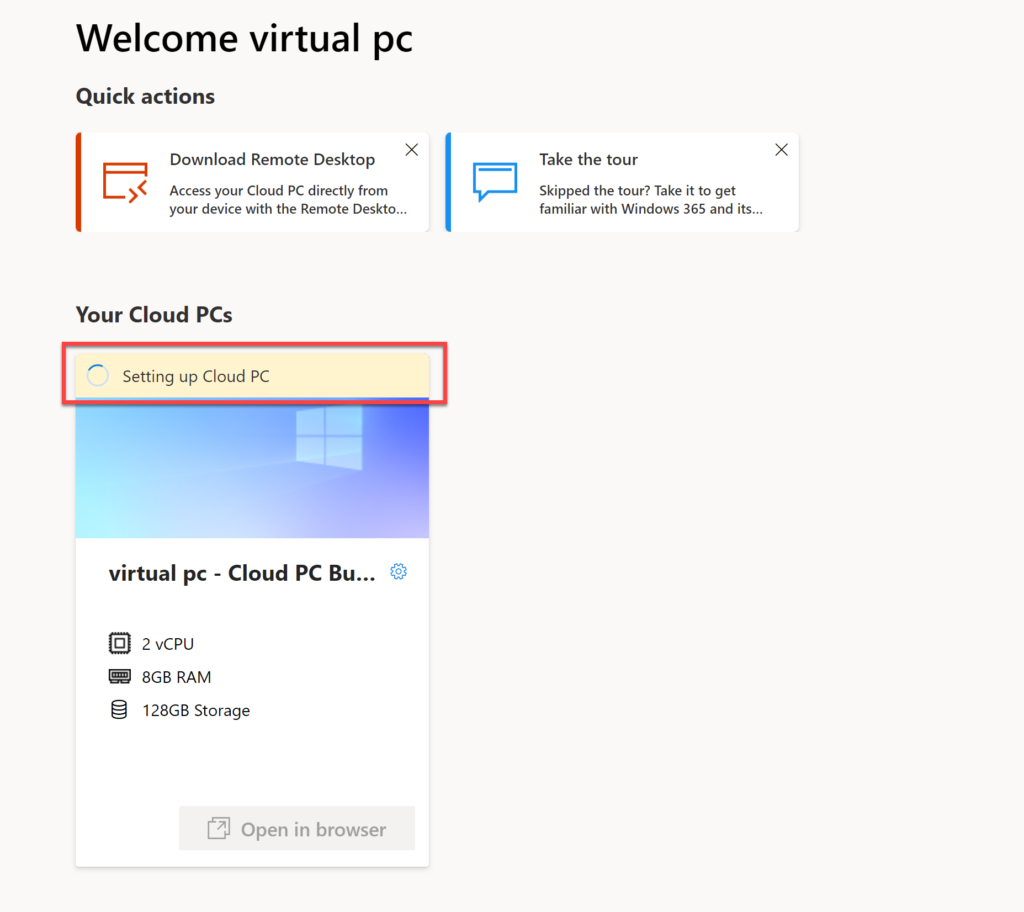
If you see the message Setting up Cloud PC – it means that your virtual PC is still provisioning. Wait a little bit longer.
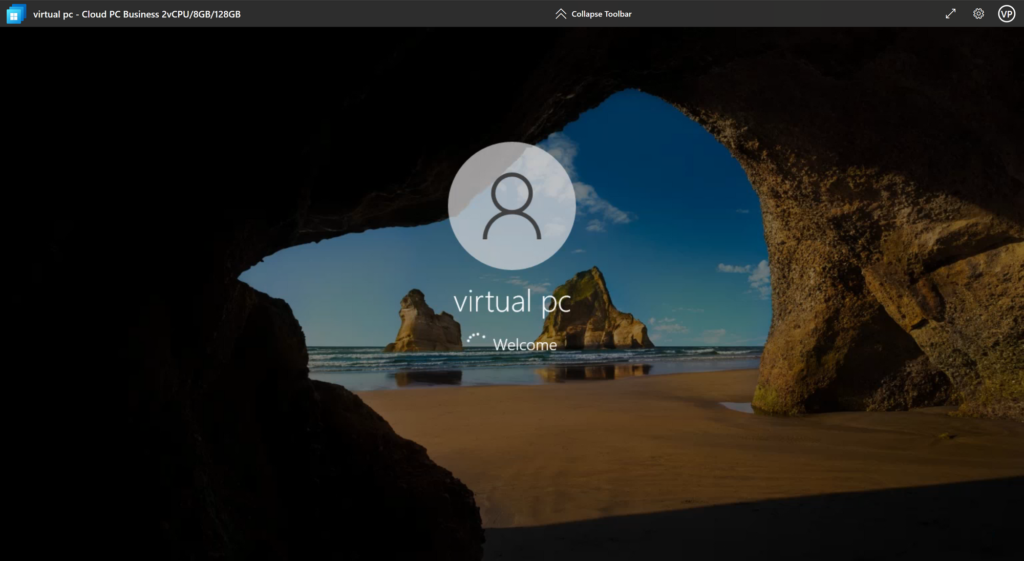
Once the Cloud PC is provisioned, Open in browser button should become available and the message – Cloud PC is ready. Click on Open in browser.

If you click on Open in browser, before you connect, you will have the option to choose what resources you want to be available from your computer. Print, Microphone, Clipboard. After clicking Connect, you will be asked to re-authenticate, and you will be logged into your desktop.

This is what it looks like, just like logging into a computer.
NOTE: If you are experiencing problems while provisioning, make sure you check your MDM settings. If you have MDM set to All and your user does not have an Intune license, you might receive an error.

NOTE: Keep in mind that in Windows 365 Business Cloud PC – your user is local Administrator.
Good to know
Using your Cloud PC from the Web Browser is convenient, but it also has some limited functionalities. To get more information about this, please refer to official Microsoft documentation.
If you click on the download icon (left side), you can find the list of the applications that you can use to access Cloud PC. If you have Windows, Android phone or tablet, Apple (iOS) – iPad or iPhone, or Mac laptop.
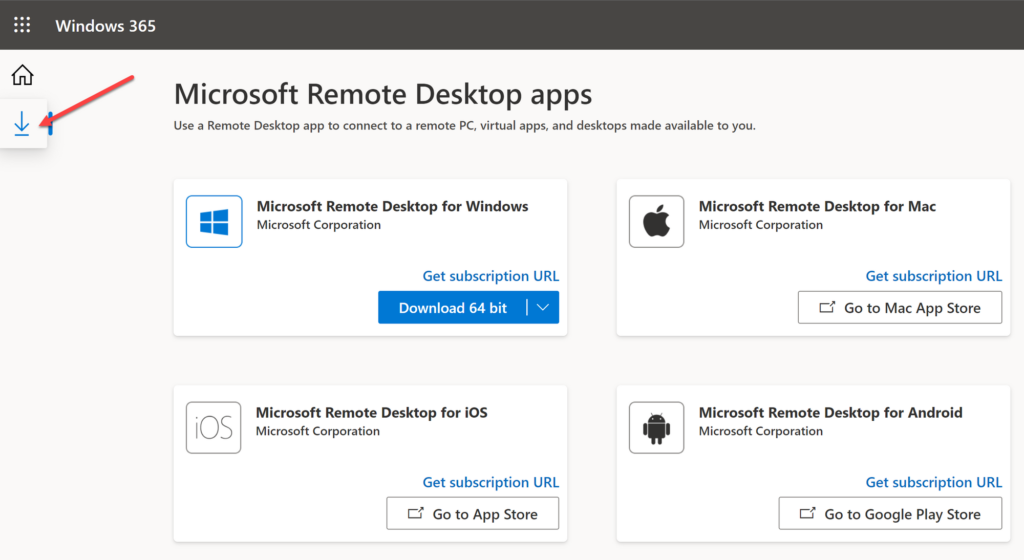
This is a fairly straightforward process. Download the app (client) and log in using your credentials.
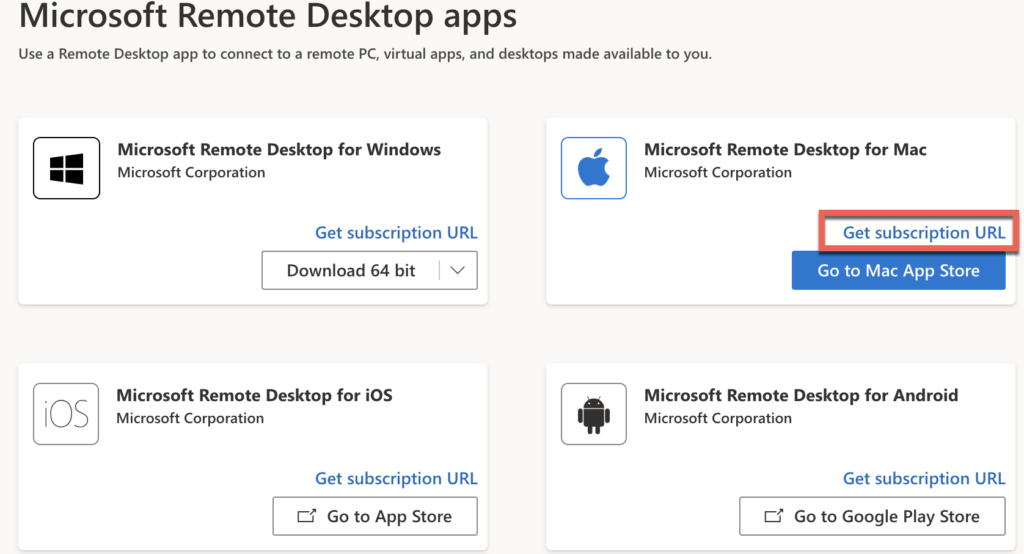
Let’s see how it looks. Here’s an example of how you would do it on a Mac.
To install Microsoft Remote Desktop for Mac you can click on the link Go to Mac App store, or go to your App store and search for the Microsoft Remote Desktop. Download it and open.
- Once you open Microsoft Remote Desktop, go back to Microsoft Remote Desktop apps and Get subscription URL.
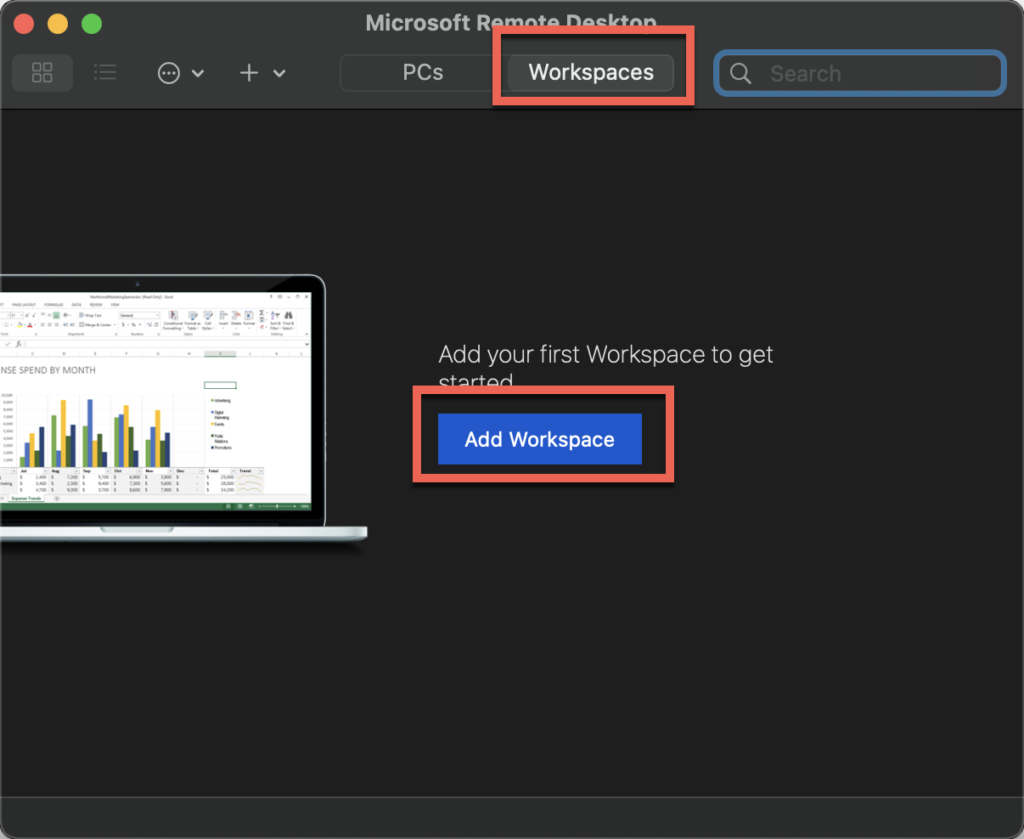
- Now go back to Microsoft Remote Desktop app, switch to Workspace tab and click on Add Workspace.
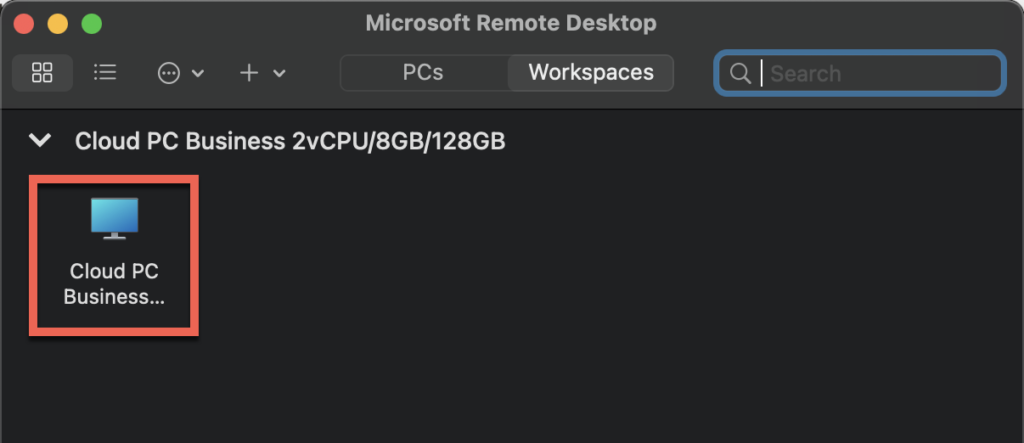
Now, past subscription URL and click on Add. Now, type in your credentials.
If everything went well, you should see you Cloud PC. Double click on the Cloud PC to connect.
And that is howThat is how you set up a Cloud PC.
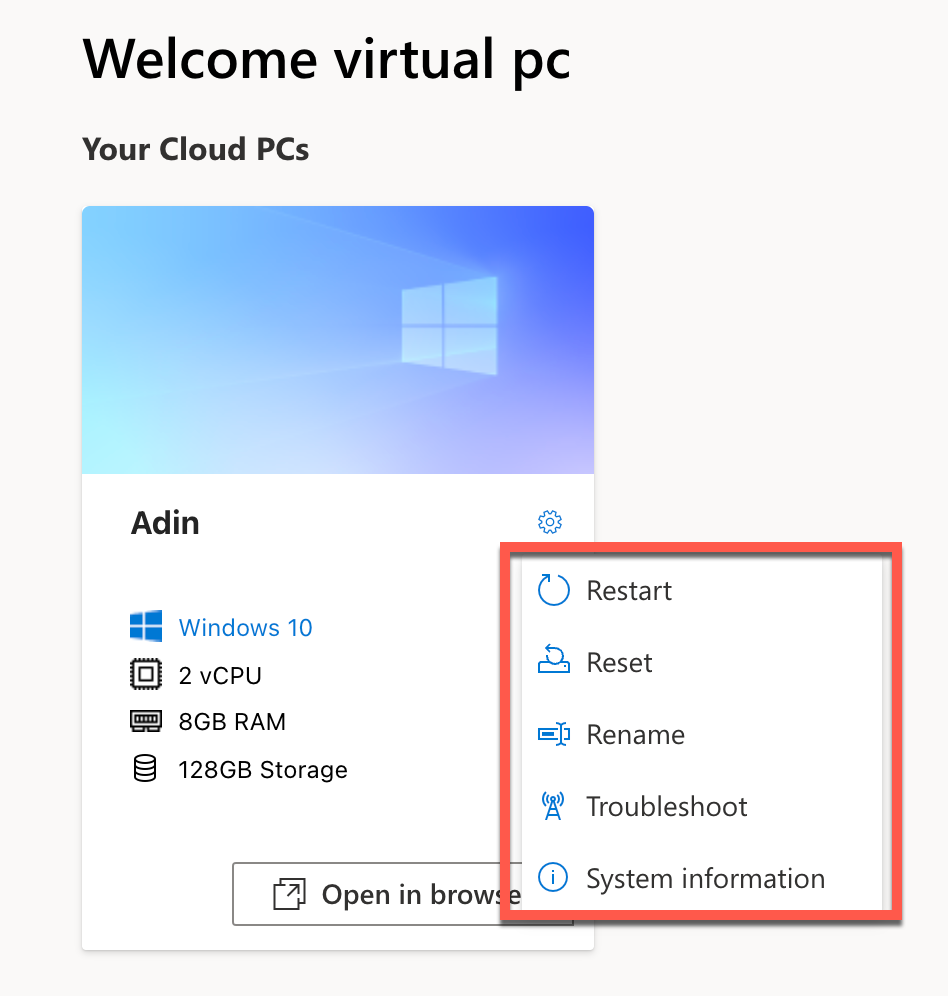
Can an end user change anything on this machine?
End users can perform maintenance on cloud PCs easily via the Windows 365 web portal.
Currently, these are the options below:
- Restart. Restarts the Cloud PC.
- Rename. Changes the name of the Cloud PC shown to the user on windows365.microsoft.com.
- Reset. Reset does the following:
- Reinstalls Windows.
- Removes your personal files (OneDrive data remains).
- Removes any changes you made to settings.
- Removes your apps.